Showing posts with label Valentine's Day. Show all posts

Friday, February 18, 2011

Jezzie's Valentine for Daddy


OOps! Almost forgot to post Jezebel's Valentine for her Daddy, a real quicky since she came in all upset last Monday morning asking where her card was. Eiyiyi! Had to improvise because I needed it done before breakfast. Fortunately I had a side step base laying on my table that I'd rejected for my Cuttlebug Spot card. Then I scrambled to find my Hello Kitty Sizzix Bigz die (Jezzie LOVES Hello Kitty). Thought the bee outfit would work for "Bee Mine" and I'd never used it. (Big surprise) Thought the die would be quicker than my Cricut, but not really. You have to sort of cut apart the die cut, which is just one layer, to do any layering but I managed. I added a few Nesties Hearts and a punched one to her hand.
The sentiment was spelled out in Alpha Beads and the hugs and kisses were cut with my Cuttlebug die out of craft foam. (Cuts like buddah!) Jezzie was none too pleased that Hello Kitty was neither flocked nor glittered but I told her Mommy needs more time for that so I appeased her a bit with a tiny amount of stickles on the wings and by using an Action Wobble for her head. Now that she LOVED! (So did Daddy, but he loves anything from Jezzie, even hair balls. Well, maybe not.)

Tuesday, February 15, 2011

Tiddly Inks Monochromatic Challenge


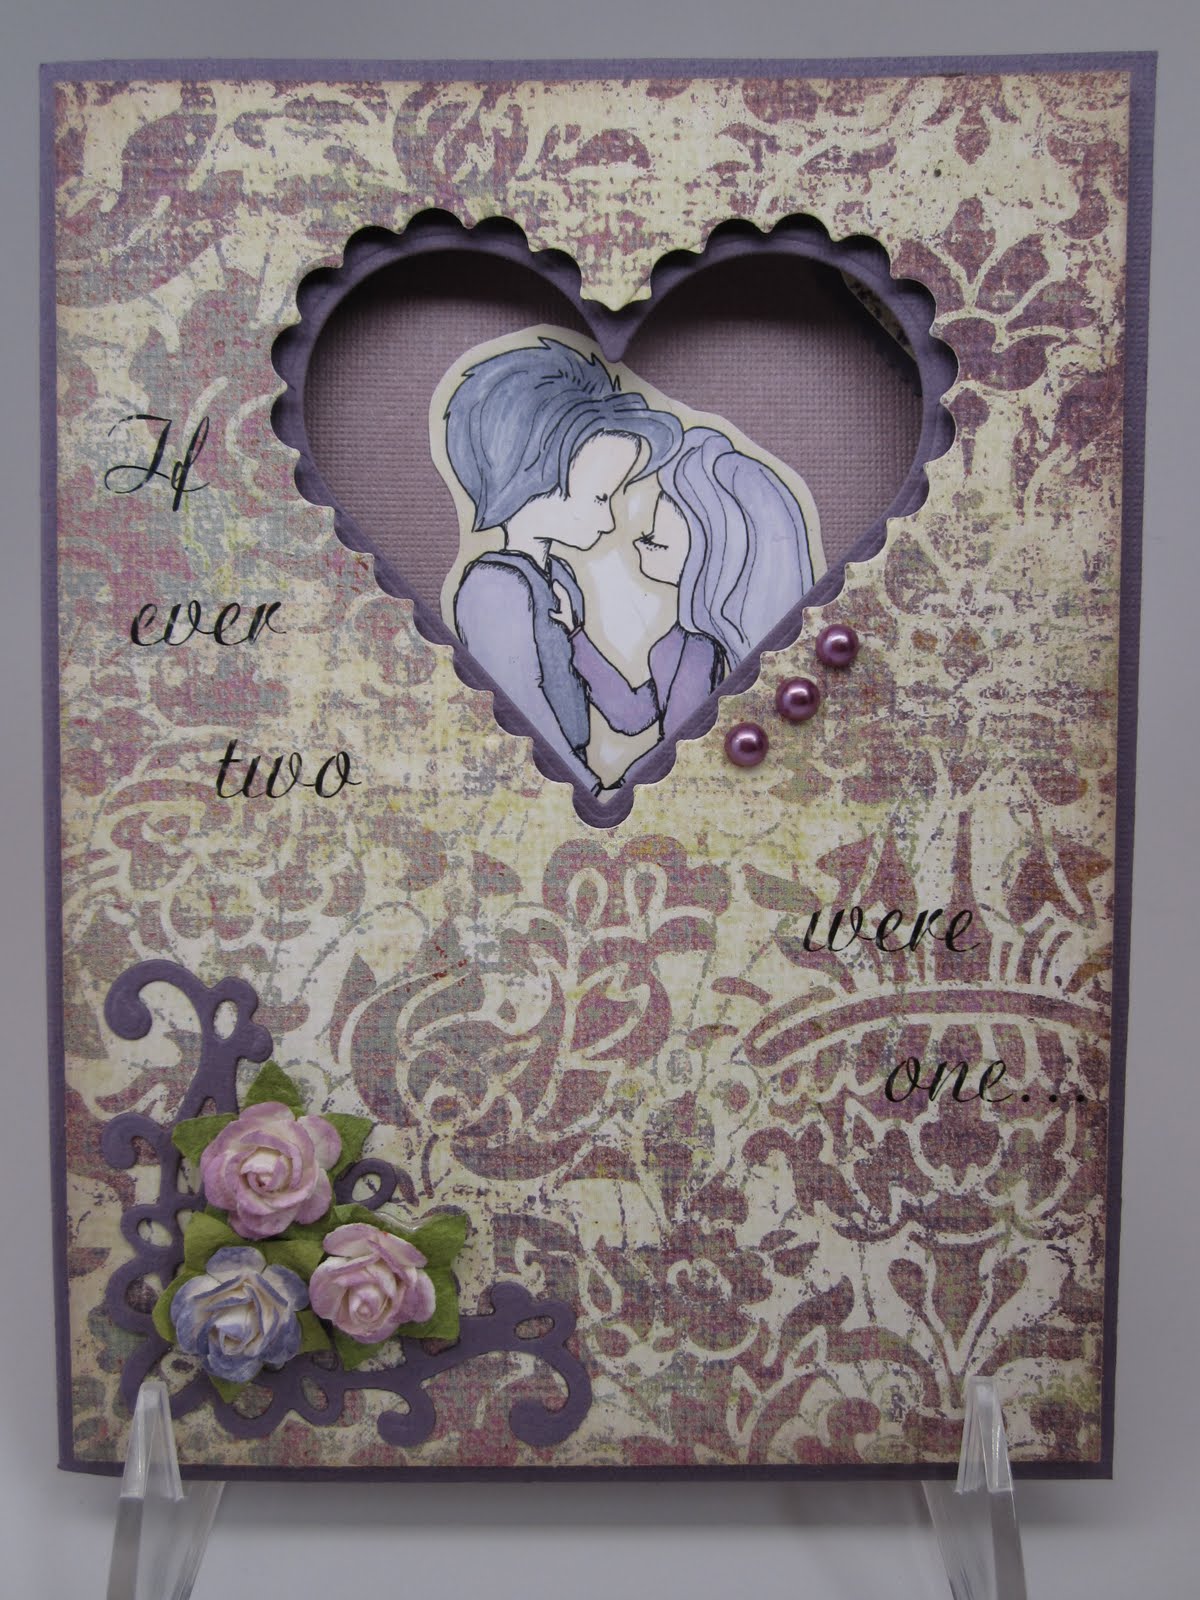
It's another Tiddly Tuesday and this week our challenge is Monochromatic at the Tiddly Inks Challenge Blog. I'm obviously still in the mood for love, using As You Wish behind my Nestie Heart window. This is one of Christy's most romantic images which always brings to mind the quote, from a poem by Anne (Dudley) Bradstreet. It says, (in case you can't read it through the yummy paper) "If ever two were one, then surely we". I'm pretty sure I first heard this in the early 70's when I was learning about life and true love and it has stayed with me all these years. MMMMmmm....perfect love. It truly warms my heart.
The couple and roses on the front are colored with Copics and the lovely corner flourish is a Spellbinder's die from Heartfelt Creations. There are gorgeous example of monochromatic designs by the Tiddly Inkers so be sure to check out their lovely work HERE and pop by Christy's blog for a peek at what's new and a fab freebie sentiment. Remember, we welcome all images in our challenges, but you are only eligible to win a prize if you use a Tiddly Inks image. You can find some each Tuesday on Christy's blog, The Tiddly Inks PCP Group (just ask to join if you're not already a member), and some permanent ones in the Shop. Hope to see you soon!

Monday, February 14, 2011

BBTB2 Heart Border Challenge


Happy Valentine's Day! Busy day and I'm running a bit behind. This week my dear friend and DT sister Susan chose the heart border and decorative heart from the Martha Stewart Seasonal Cake cartridge for our BBTB2 challenge. Wow, 2 week's in a row I didn't have the cart (better get shopping, LOL) so I chose one from Stamping and welded it to "Love U" from All Mixed Up. (Love that whimsical font!)
Again, it's a shaped front card (one of my faves to make) using the rounded rectangle from George for the back. The inside mat is actually adhesive backed Dear Lizzy fabric paper from American Crafts and I did manage to cut it with my Cricutl I used my deep cut blade because I figured it was sharper than my regular one and probably multicut is at least 5 times. It did snag a bit and next time I won't try it unless I have a brand new blade, but it was okay (but not perfect...grrrr).
Lots of layers and a bit of embossing and the cute adhesive conversation hearts were in my stash from M's several years ago. I'm hoping Susan will count them as decorative hearts. LOL Go have a look see at the lovely projects from the rest of the BBTB2 team and we'd love it if you'd play along.


I'd also like to enter this in the Fabulous Friday Challenge at Frosted Designs where the sweet and multitalented Chloe is Guest Designer. She has challenged us to us the word "Love" on our project and you've got to go see the amazing things she has done with the word "Love"! Now I'm off to clean up for a romantic dinner in the city, WooHoo! Hope your day has been super special, or if not, my Macabre Monday post (scroll down) for today may be more to your liking. LOL

Macabre Monday Love Bites (Romance is Dead) Challenge


This week the Macabre Monday Challenge at Haunted Design House is Love Bites; the End of Romance. Certainly love can hurt and for those who have been wronged, Valentine's Day is a painful reminder. I hope that's not the case for you. I used the Cricut Love Struck Cartridge to design a shaped card using Design Studio. I've done a bit of trimming to accomodate the fabulous Corset Heart Stamp from Strange Skin, this week's sponsor.
Inside is a computer generated sentiment cut with my Nesties Labels Seventeen. A crime of passion or self inflicted? Stop by Haunted Design House to see how the rest of the Minions celebrate VD. YIKES!

Saturday, February 12, 2011

Some Odd Girl Digi Day AND Weekly Challenge


Well, I've had a ball all morning over at the new SNR site celebrating Some Odd Girl Digi Day. There were games, challenges, discounts and all around FUN! This time I even managed to participate in the Saturday Challenge by DT member Caz to print and color your image on kraft card stock. WooHoo! That's a new one on me so I just HAD to try it. I chose Valentine Tobie and I really love how soft the Copics look when coloring on kraft. Who knew? The DP is Chelsea's Place by Making Memories. I added 2 MS punched hearts (to total 3) so I could also enter it in the Weekly challenge at the SOG Challenge Blog as well. Thought the sentiment was fitting for a shy little guy like Tobie, don't you? Now let's see if I can manage the Early Bird bookmark challenge too.

Thursday, February 10, 2011

Goliath's Valentine to Daddy


This year Goliath decided he wanted his Valentine to Daddy to be like the kind kids used to give out in school (do they still do that?) you know, the flat kind that don't open. Well, Mommy thought that was a fine idea, BUT flat? of course not. I love the little Tiddly Inks Kitty Christy has done a number of ways and decided on Sealed With because of the envelope he was holding. I printed him BIG and colored him with Copics trying hard to make him look like Goliath (although he looks a little bit like a racoon to me but Goliath said he was okay). He's fussy cut and popped on a manila tag on top of Nestie Hearts that were cut from the DCWV Pet Mat Stack.

I replaced the envie with a real envie so Goliath could enclose a special something for Daddy. (More on that later.) The little paw print seal was fussy cut from the stamped envie. the sentiment was spelled out with epoxy letters from J's. Paw print border punch down the side (as close to lace as Goliath would let me get) is EK Success. The mouse border and rat punch are by MS.

Here's a close up of Goliath's special gift (that fits in the envie). Please notice Heather, that this rat is dead, see the x'ed out eye? Not to be confused with the LIVE one Goliath brought in through the cat door of the run on the back porch yesterday. Daddy had a heck of a time corraling that one. This, BTW, is the same cat door that David insisted on putting in the run so he could go in and out at will. Does he? Of course not. Goliath still insists on waking me up every morning at about 2:30 am by pawing at my face to let him out and cries at the back door to come in. When we're around he acts like he hasn't a clue what that door is for, or that it's beneath him to actually open a door for himself. Jezzie however, thinks it's the cat's meow!

BUT today he was caught in the act! In case you can't tell, Goliath has another surprise for Daddy. See the LONG tail hanging from his mouth?

In he comes, the little stinker! Fortunately we closed the window and blocked off the other door before he could bring this little gifty into the house.


Okay, so let's play!


OH, you're no fun. I'll leave you for Daddy. (The bad news is Daddy keeps telling him "Good Boy"). Wonder what he'll bring in tomorrow.
Be sure to check out the Tiddly Inks Challenge Blog for Fabulous Friday tomorrow and there's still time to participate in the current Love is in the Air Challenge.

Thursday, February 3, 2011

An Adorable Freebie From Peggy Loves Vintage!


Looky here! Peggy has done it again, offering one of her adorable vintage images ABSOLUTELY FREE on the Peggy Loves Vintage Blog. So why are you not a follower? Not only does Peggy offer wonderful freebies, but it's THE place to go for info about specials on her CD's and Cut Outs. Nobody does vintage like Peggy! Anyway, in the middle of the night I had a bit of insomnia and of course did some blog hopping. I snagged Peggy's adorable image and when I went back to bed, all I could think about was how am I gonna use it? Just before falling back to sleep the idea of an envelope on the front of the card crossed my mind and I fortunately still remembered it when I woke up. I used my Crafter's Companion to make the little 3x4" envie which was the perfect size to fit on this A2 card. I embossed the portion of the card front directly with the Heart Blocks Cuttlebug folder. The Lattice Border is an MS punch embossed with tiny hearts from the Cuttlebug Love Language Card Making Combo. The envie insert is from the Cuttlebug Embossed Tags Emboss Plus folder (trimmed a bit) with a computer generated sentiment.


The sentiment fits into the little front envelope which folds down so the whole card still fits into the regular A2 envie and when you pull out the card, it pops open a bit to reveal the contents. The tiny hearts used both inside and out are a $1 punch from M's.


Inside I repeated the lattice and added the postage stamp cut and emboss folder that I got free with my Cuttlebug. I don't do many A2 size cards, but I love how this one turned out! Now don't you want to go check out the Peggy Loves Vintage Blog? And while your at it, check out the fab CD's and Cut Outs available on her Web, Etsy and Ebay stores. Valentine's Day has never been easier.


Now David and I are on our way to Post Ranch Inn in Big Sur for a little R&R. No tv or internet, but a beautiful place with gorgeous surrounds and YUMBO food. On Saturday morning I'll be back to post the winner of the BBTB2 Blog Candy so be sure to return to see if you've won, and if you haven't already commented, there's still time, so please scroll down.


And announcing DANIEL MICHAEL CALENDA, born (finally) at 2:40 AM EST today. Danny Boy is the 5th grandbaby (4th boy) for my dear friend Margie (Bella Bug). Congrats, Margie! You're working on a baseball team, eh? Now get some sleep, it's been a long 2 days! BTW, I just talked to Margie on the phone and she said it was ok to post this. Didn't want to steal her thunder. LOL

Tuesday, February 1, 2011

The Cuttlebug Spot Tri-Fold Card


This is my second post of the day, so please scroll down for my Tiddly Inks card, and don't forget the BBTB2 blog hop (in case you missed it yesterday. There's candy involved.)


All month at The Cuttlebug Spot we'll be focusing on card folds. This week it's tri-folds and because it's fast approaching, we're to make one with a Valentine's theme. When Googling tri-fold cards I came upon a number of different styles but I finally settled on a "Swing" tri-fold. I've made several of these before and followed the video HERE to do it with my Cuttlebug and my Nesties Scalloped heart.


I wanted an unabashedly romantic, vintage style Valentine and needed a larger folder to emboss the inside mat and found these gorgeous roses and birds in the Cricut Companion Rock Princess Cuttlebug set. The center of the folder has the word "Rebel" on it (which may be appropriate, but wasn't exactly what I had in mind for the card) so I made sure when I placed the mats in the folder that the hearts would cover that part. A little note on the front mat. If you choose to have one, you should use removable tape to tape it in place on the front of the card before cutting it with your Nestie for a perfect fit. the Nestie easily cuts through the two layers. Then you can remove the colored mat for embossing and permanently adhere it later. (Hope that makes sense)
All sentiments are computer generated and the pink hearts (also Nesties) within the scalloped ones are popped for dimension. The label is cut and embossed in one step using the Cuttlebug Emboss Plus Fanciful Labels folder (LOVE it!) and adhered half way to the left of the front of the card only, so it will swing when the card is opened as well. The little dove on the front is a MS punch. As you can see, when the card is opened, the heart swings over. Don't you just love a card with a little movement?
Fully opened, the rest of the sentiment is revealed. All it needed were a few adhesive pearls. Yikes! It certainly is PINK, isn't it? and so's my background! May have to change that, but for the moment, I wanted to get the message out. Well anyway, you'll be amazed at the variety of tri-fold cards the DT has made for this week's challenge so be sure to check them out HERE and we'd love you to play along to win a $20.00 gift certificate to Custom Crops. (You need to make Valentine's anyway, don't you?) xxD

Tiddly Inks Kiss Me You Fool Challenge


This week our challenge at Tiddly Inks is Kiss Me You Fool. Our designs must include an image kissing or the word kiss in the sentiment. There are many adorable Tiddly Inks images I thought about using for this challenge, but I finally decided on Froggy Thoughts (a super bargain at only $1.00) which not only has a cute frog prince, but many fun froggy sentiments as well. I'd just been creating a card with my Cricut using the Love Struck cartridge and I noticed the "Kiss" cut and thought it would be perfect as a base for this challenge. I think many crafters who use the Cricut never think to combine them with digi stamp images, but I think it's a fun way to expand one's crafting horizons and make a truly unique card. I created the shaped card using Cricut Design Studio.
I printed the frog prince 3 times on designer paper and because it was paper, not card stock, I glued the images to card stock for strength before cutting them out. I printed it out one more time on plain white card stock so I could color and fussy cut the crown. Paper piecing is an easy way to add color to the image without the use of markers or pencils. I popped the front feet and and then the head to give a him a 3D look and added lidded google eyes (made by Darice and found in the kid's craft area at J's). The cute sentiment was cut with my Nesties labels 11.

Here you can see the dimension of the whole card. Isn't it cute? I used fun Spring colors because I thought it could work for occasions other than Valentine's Day as well. For more inspiration be sure to visit the Tiddly Inks Challenge blog and check out the Tiddly Inks Store to see the fun new images for Valentine's Day and more.

Monday, January 31, 2011

BBTB2 Love Struck Hearts Challenge and Blog Hop!


I can't believe we're almost through with January, but happy to finally be back to our end of the month Blog Hops at BBTB2. You should have arrived here from the wonderfully talented Shelly's blog, but if not, you may wish to start HERE, at the beginning, so you don't miss a thing. My super sweet and oh so talented friend and DT sister Maria chose two of the hearts from the Love Struck Cartridge and really wished for a layout, but was kind enough to allow us non scrappers (who me?) the option of making a card. I knew immediately what hearts I wanted to use. Scroll down 2 posts and you'll see why. I can't believe I hadn't cut them before.
The card has a shaped front which as usual, doesn't really show in the first pic. All is welded in Design Studio to the welded rectangle from George which I pull and skew until it's the right size. The front sentiment comes from Wild Card. Since "Wild about you" comes all together as a cut, I had to hide the contours of the rest of the phrase to have the "Wild" and "about" be different sizes and placed how I wanted them on the card. Let's just say it took me awhile to design this one, but I'm quite fond of it. I'm hoping a certain someone is too. HeeHee!
This one turned out to be FAT, even for me. the "U" actually ended up having a full 6 popped layers! I make my own adhesive foam using Fun Foam and double stick tape in loads of colors and cut it myself so the dimensionals aren't so distracting when viewed from the side.
And lo and behold, I even finished the inside! the dotty paper is Bo Bunny. I used small clear epoxy letters from J's and backed them with little punched circles (so they'd show up) for the "so let's" and also for the "I'm" on the front (which you can barely see because of the glare.) "Go wild" is from Straight From the Nest. Sometimes it's difficult to do an inside sentiment on a shaped front card without it showing from the front, but I placed the large heart and hugs and kisses (from Wild Card) exactly behind those on the front and the rest of the front elements hid the the slight run over of the sentiment. Of course it wouldn't be complete without some little metal adhesive hearts and the ever present adhesive beads. Now hop along, but not before leaving a comment for a chance to win a $30 gift certificate to Custom Crops. Next up is the gorgeous and super talented Julia so enjoy!

Saturday, January 15, 2011

Cutie Couples from Peggy Loves Vintage


Just in time for Valentine's Day, Peggy has release 3 new sets of Cuties Couples Cut Outs available on the Peggy Loves Vintage Website, Etsy, and Ebay stores. The cut outs are an easy fast way to enjoy Peggy's adorable images and I immediately fell in love with this cute couple from Cutie Couples 3. You remember my dinner party last week? Well, I pulled out all the stops with my best china, crystal and silver, but the bad news was it all required hand washing. We had spent 2 days cleaning and cooking and enjoyed it all immensely, but at 1:00am I was hardly in the the mood to begin washing the mounds of dishes (although waking up to them is infinitely worse). As I was wrapping up leftovers, there was DH washing away. Got to love him! The retro DP is DCWV Nana's kichen stack and the sentiment was computer generated using my Greeting Card Factory Deluxe program.


I used Scalloped Rectangles and Petite Circle Nesties on the front and Mega Classic Ovals and Mega Scalloped Oval Nesties inside. The hearts are a MS punch. I thought it would make a cute Valentine or Anniversary card, or in this case, a Thank You.